Installation is quite easy and straightforward… I provide the very basics here. If you want more info, see this official guide for installing Blue.Box VOIP Server powered by FreeSwitch.
- Download blue.box ISO from here: http://www.2600hz.org
- Option A) Burn ISO to CD using ImgBurn available from here: http://www.imgburn.com
Option B) Mount the ISO in VirtualBox or your favorite VM. - Boot a computer to the CD (or your VM to the ISO). Note that the computer should contain NO data you want to keep, as the installer wipes everything on the computer.
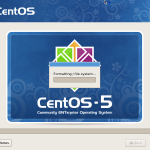
- Follow the basic on-screen prompts; start by pressing Enter on the screen shown below, and the rest is pretty much automatic.
- When the PC / VM reboots, remove the CD, otherwise the automated installer may start over and install again; which it will continue looping if you don’t remove the CD.
- Restart the PC again and the system will load.
- The next thing you should do is login at the command line. Username is root, password is bluebox.
- Now, VERY IMPORTANT, change the password. Type passwd and hit enter. Type your new password. It won’t show anything as you type, but it’s getting the keys anyway. Hit enter. Type it again and hit enter. Done.
- Now check that the date/time/timezone is correct by typing date and hitting enter. If the timezone is wrong, follow this guide to fix it. If the date or time is wrong, type the below line, substituting in the correct “day month year hour:minute:second”.
date -s “2 OCT 2006 18:00:00” - Now you need to get the IP address of the box, so type the following:
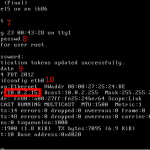
ifconfig eth0
The 2nd line where it says “inet addr:” is where your IP is. It’s the numbers after the colon: xxx.xxx.xxx.xxx
Write down this address, you will need it later.
See these images for the installer.
You can also find more at the Blue.Box website linked above. Also you can follow this guide if you want to install it to an existing Ubuntu box.


